Upon request, I would like to explain in more detail as to why exactly I am hoping to follow through with this restoration.
First of all, as I am doing this for class credit, this restoration so far has allowed me to learn about letter press printing as I did not have any prior knowledge. If I were to actually restore the press and gather needed parts, I could potentially extend my independent learning by using the press for its intended purpose: to print! -On a side note, doing this restoration for class credit would be at a minimum cost to the University as I am sure if the press was to be fixed by a professional, the cost of labor would be somewhat substantial.- As you can see, my personal interest in letter press printing has gotten me this far; however, my own learning is not my main purpose for wanting to complete this restoration.
As I have mentioned in a previous post, I met with Doug Younger in the Graphics Department, he pointed out a picture to me when we were walking through the GIT printing lab. This picture was from, if I remember correctly, the 70's and it looks as though the very press I am trying to restore was being used in a class in its pre-blue painted state. -My main purpose for this press to be revived is so that current and future students at Pittsburg State University will have the ability to use it once again.
Mentioning the graphics department furthers my purpose for this restoration. I found it odd that it took me to meet with a printer in KC telling me about work he is doing with a GIT professor to come to the conclusion that the GIT department actually has letter presses. I most likely would have started there with my research and asking questions if I would have known. Anyway, I find it odd that we have this piece of equipment that is unused in our departments "printmaking" course and over at the GIT department, they have many letter presses being used in their "printmaking" courses. If by chance, the two departments could collaborate their printmaking classes, this would allow students to see why printmaking is important to each field of work and help them to relate with one another. I'm sure there would be a lot more knowledge and techniques provided to students who were exposed to both departments, even if there was only one or two meeting in the other department during a semester.
Another great reason for this to be restored and to possibly unite the Art and GIT departments is the exposure students would be gaining. This exposure has relevance to contemporary printing programs at a school like Otis College of Art and Design < http://www.otis.edu/letterpress-studio >.
As you can see my interest in cleaning up this letterpress does not stop at my personal learning but extends to the current and future students of PSU. In hopes of uniting the Art and Graphics departments to put even more emphasis on the many types of printmaking that art focused schools tend to have. This opportunity could grow and provide yet another in-depth facet for students at PSU.
Tuesday, November 12, 2013
Friday, November 8, 2013
Letterpress Restoration: Report and Time Frame
I have included the official report that I will be presenting and discussing to my art department chairperson on Monday, November 11. This meeting will decide the fate of the rest of the restoration.
Letterpress Restoration Report
Catherine Jepson
Restoring the art departments “broken” letterpress has been
a part of my printmaking independent studies course this fall semester. Through
research, meeting with a few professional printmakers in Kansas City, and
talking with Doug Younger in the technology department; it has come to my
attention that the next step in this process will be the actual, hands-on
restoration. With that being the case, funding will be needed. The point of
this restoration is not just for independently learning how to restore the
press but more so that this mid 1930’s press can be used again by PSU students.
The press is very basic with only a cylinder being used to
roll over the type, in order to transfer the image. The press’s current state
includes a lot of rust that needs to be removed. It has been recommended to try
using naval jelly, wire brushes, and WD40. The cost of 2 wire brushes ($5.97
ea. = $11.94), 16oz container of naval jelly ($6.98), and 1 gallon of WD40
($16.86) would be roughly $35.78 at Home Depot. There are not any signs of
cracking or missing pieces within the bed, cylinder, or the track that the
cylinder glides on, which means the press is in pretty good shape. Also, parts
of the press are (very poorly) painted blue, to get it to its original state;
an orange paint stripper has been suggested. A ½ gallon of Citristrip from Home
Depot is ($19.97).
As for other parts needed in order to actually print, the
list includes: tympan paper, ink, furniture, heavy weight oil, positive lock up
bar, lead cutter, other items that are not necessary but would be helpful
include a frame, quoins and quoin keys, and the proper type. Tympan paper,
coupled with many more sheets of regular papers, is used as the outside layer
wrapped around the cylinder to create the necessary pressure. The sheet size
would roughly be 20”x28”; however, you can purchase a roll to cut down to size.
Depending upon the amount needed, a roll can cost from $50 and up to over $500.
As there is not a need for a large amount, buying a small roll or by sheet
would be ideal. NA graphics, Briar Press, or ebay would be other sources to buy
tympan.
http://ladiesofletterpress.com/forum/topics/tympan-paper-for-8x12-cp
Last comment shows a large roll of 18” tympan for cheap; unsure of price
Ink would need to be thinner than what is used already in
the art department’s printmaking studio; Doug Younger offered to give me a few
samples to get started, as well as paper and oil. Van Son rubber based ink is
what Mr. Younger and the K.C. printmakers use and suggested. http://www.vansonink.com/products/Rubber-Base-Plus.html
When the time comes that ink needs to be purchased, a pound of pantone black is
$18.75, colors are between $20-35.
The following links are to Briar Press where I have found a
few sets of furniture for sale; all are different prices and amounts of pieces.
The furniture is used to lock in the type onto the press, basically holding it
into place.
http://www.briarpress.org/35606 Furniture case with Furniture, tympan paper roll, quoins
and quoin keys (these parts are included in a larger lot, owner may sell
pieces)
http://www.briarpress.org/35376 around 200
pieces of furniture plus the case = $125
http://www.briarpress.org/35104 72 pieces
of furniture = $50
http://www.briarpress.org/35796 Furniture
case with furniture, tympan paper roll, quoins, lead cutters, leading drawer =
unsure of pricing
Included in some of these sales are other items that could
be used such as the tympan paper, lead cutters, and quoins. The lead cutter is
used to cut lead pieces which are used for the same purpose as furniture except
for smaller spaces.
A positive lock up bar would be unlikely to find so I would
have to make one with wood, which would be relatively cheap (about $10 or less
for wood). Quoins and quoin keys are used to block in the type as well, usually
coupled with a frame; all of these items are very handy but not necessary, plus
slightly difficult to find. We will not need to buy type as the type we have is
the right height and will suffice, plus type can be quite expense when buying a
set.
Overall, the
restoration will be relatively inexpensive. Rust and paint removal will cost
about $55, and to get the press running, depending upon where the furniture,
wood for the lock up bar, tympan paper, and lead cutter are purchased, the
entire restoration would cost roughly $115-300+. Again, added on pieces that
would be handy (quoins, quoin keys, ink, frame, type) but not necessary would
be additional money and time spent researching to actually find the items.
For further information on the press restoration thus far,
please visit www.catjepson.blogspot.com
Letterpress Restoration Time Frame
Catherine Jepson
With time in this semester running out, the actual restoration may need
to be accomplished at another time. Gathering adequate funds, purchasing the
parts, cleaning off the rust, blogging, and following through with any other
tasks is too much to achieve in the remainder of my independent studies. If proper
funding is available, it would be suggested that a portion of time in the future
be put into the restoration. I would appreciate having the opportunity to see
this restoration process through myself, unless having another student take
over is suggested. As for the completion of the restoration, it would entail
either a two week focus between the 2014 spring and summer semesters, a one
hour credit course throughout the 2014 spring or fall semester, or any other ideas
that may work. If a one hour course were to be completed to restore the press
in the spring, a possibility of 2 hour credits in the fall to print on the
restored press would complete a full 3 hour independent studies course.
Another tangent onto this letter press project is, hopefully, for me to
pass on the information I have learned so that the press can be used in a
classroom setting. That is if the art department has interest in adding this to
the printmaking curriculum. If so, the cleanup of the press and taking time to
figure out how to print on it would be circuital in educating myself and
passing that information on. Figuring out who and when to educate on this topic
would need to be considered.
Saturday, October 12, 2013
Letterpress Restoration: To Restore or Not to Restore?
Answers were found for the images from the last post... Ben, from Hammer Press, informed me that the type is, in fact, for a showcard press; however, as I have learned before they can be used on this press, no problem. As for the rest of the items in the pictures, such as the "long rails with teeth", they are the grid system to a showcard press. So glad to know what they go to; however, we don't have a showcard press! After asking Ben what his thoughts were on where this equipment may have come from and how it was used, he strongly believes that it was all donated without the showcard press and that the Vandercook was most likely used with the showcard type and type high lino blocks. With these answers, I was unsure of my next move with the press so I decided talk with my professor about whether or not the restoration will actually happen as well as <finally> meet with the professor in our technology department that works with letterpress's.
It looks as though the deciding factor on whether or not I will complete the restoration will depend on a report that I will create and submit to my department chair. The report will consist of a description of what I have done in the way of researching and learning about the press, my plans for fixing it, and of course how much money is required for supplies to do so. On the other hand, the tech center professor has offered to help out with a few samples of red, yellow, and black inks, some paper, and a bit of oil to get me started. Also, I have been given access to the polymer plate processing machine, if and when the time comes!
I feel like the majority of the cost of the restoration would go towards the rust and paint removal, then getting (or making) furniture, tympan paper, and either buy or make the lock up bars for either end of the press. We don't necessarily have to buy type as we can use the showcard type, nor do we HAVE to have a frame or quoins (in the long run, they would be very handy to have).
I will be sure to post my summary/report of the restoration!
Tuesday, October 1, 2013
Letterpress Restoration: Press and Type Inspection
I have completed the quick inspection of the press and type just to see if anything is broken, missing, etc. The press looks pretty good, no missing teeth on the track or on the cylinder. There aren't any cracks from what I can see in its rusty stage. On either end of the bed there are bits of metal sticking up that holds a lock-up bar onto the press rather than there being holes on either end for the lock-up bar to fit into (shown below).

As far as the type and everything that goes with it; no wooden or metal furniture to be found, there is a pretty good selection of leading, no lock-up bar, no quoins or quoin keys, no frame, no grippers, and all of the type is either metal or wooden "show case" which has the slots in the back side.


As far as the type and everything that goes with it; no wooden or metal furniture to be found, there is a pretty good selection of leading, no lock-up bar, no quoins or quoin keys, no frame, no grippers, and all of the type is either metal or wooden "show case" which has the slots in the back side.
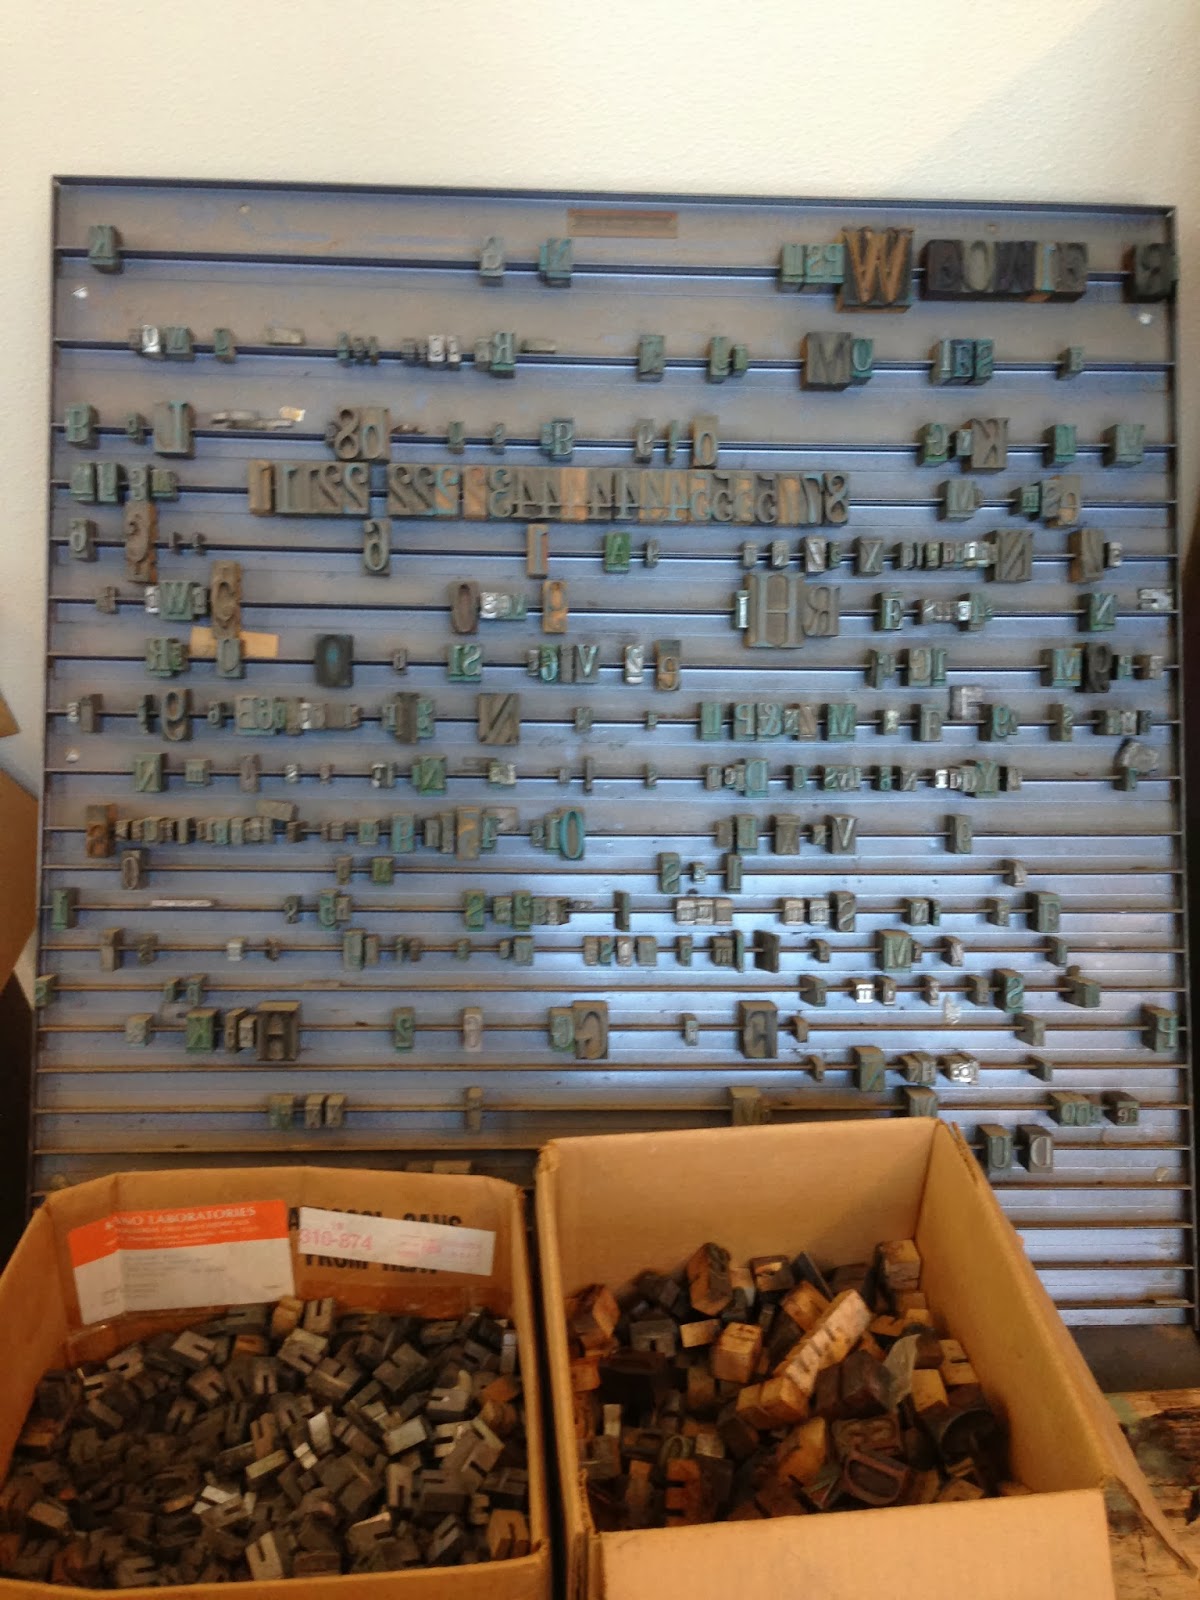


The puzzling part is all of the extra pieces I found that are shown in
the images below, I'll have to do some research on what they
are and if they are even to be used on the letter press. I'm not certain on how this press was used in
the past at PSU...


Sunday, September 15, 2013
Letterpress Restoration: Kansas City Trip
I mentioned in my last post that I had contacted a pro letterpress
printer in Kansas City and was planning to meet him at his studio
Friday, September 6th. After classes, I made my way up to meet Bob at
Skylab Letterpress. What a spectacular and extremely helpful individual!
Going into the visit, I expected to have a few questions answered, take
a look at his press and be on my way. Well, Bob was so kind and
-through two hours- showed me the press, described how it works, and
then took me into his workplace and gave me an in-depth tour which
included terminology, pictures, demonstrations, tips, and more. As he
told me, "once a teacher, always a teacher."
We started off by looking over his (rust and blue paint-free) Vandercook No. 2 press that he saved from being used for parts! Through conversation my questions were answered as well as a wealth of more information was presented.


This Vandercook press is from the mid 1930's and proves to be a very basic press, without the bells and whistles that modern presses have. First off, this is a cylinder press where the type (letters/numbers) is laid out on the bed of the press and blocked in to prevent any movement. Once the type is set into place, the print maker will lay out ink on the flat surface above the roller, roll the hand brayer in the ink, and then apply it to the type. Next the paper will be positioned directly on top of the type, either held on with grippers (a clip that holds the paper in place) or freely laying on top. Now is where the press comes into place, the printer maker will now use the roller to place pressure on the type so that the ink will transfer onto the paper. That's a pretty basic description as to how this press works. Now for terminology and details that go into the process.
The first step in prepping the press is to cover the roller in multiple pieces of different weighted paper, then cover with tympan paper. Tympan paper usually comes in large rolls which you cut a piece to size and wrap it around one of the dials inside of the rollers void, as you can see in the image below. Next is where you add the 3-4 extra pieces of paper between the roller and tympan paper, once those are in place the tympan paper can be dialed in on the other side. The purpose of adding the paper is to create enough pressure when printing so that the ink will fully transfer, this can be tricky to find the sweet spot as you don't want too little or too much pressure.
.JPG)
The next step after setting up the pressure is to "lock in the type." This consists of getting your type in the order you prefer and then locking it into place on the press with a variety of tools: metal and wooden furniture, leading, quoins and quoin keys, and small bits of paper. Here Bob was giving me a demonstration on how to "lock in type" and below that is what the type looks like when locked in.


The type is blocked into a frame that allows it to be mobile, once set on the press it will be blocked on to the press itself. In the middle of the frame is obviously the type and the bigger rectangle pieces are called either metal or wooden furniture. The little silver bits that fill in the irregular spaces are called leading and come in different sizes. Lastly, the quoins are to the left of the frame, they are used on two perpendicular edges and expand by using the key, to further tighten the frame up. Once everything is tight the printer can pick up the frame and move it onto the press. Below is an image of the frame sitting on the bed of the press and Bob holding what is called a positive lockup bar.These are used on either end of the bed, like the frame it holds everything on the press in place. My guess is this, as well as a frame, is missing from the press I am restoring, which can be easily replaced by a handmade metal or wooden one. The difference will be that the handmade one will stay in place by having dowels stuck into the holes within the press rather than the lockup bar that expands to stay put.

Once the type is blocked onto the press and the typan paper has been set, the printer will hand ink each letter with a brayer and place the paper on top. Finally, the moment of truth, after the roller has passed over the letters, the paper is lifted to see how the transfer turned out. Bob suggested to use Van Son Ink that is specifically for letter press printing rather than the thick ink I have been using for intaglio printing. As for clean up, the water soluble California Wash is doable.
I find it fascinating that printmaking has its own measuring system. The bed of a press is called "point height" which is .918 inches. For a printmaking ruler, each measurement, a "point," is an increment from .918. Any type, across the board is that tall. The saw in the picture below is specifically for cutting furniture to size by using the "point height" dial which is fixed on the saw. Even for cutting the leading, there are slug cutters that are based on that measuring system.

Bob was so kind to teach me practically everything I need to know, he even gave me a tour of his presses and the work he does. I have found that I would love to work with photo-polymer plates in which I could print many of my ink drawings. If you're familiar with solar plates, these have the same concept behind them; water soluble and light sensitive.
As for the actual restoration, I will need to see what equipment I have to work with and what is missing. I will need to purchase heavy weight oil that will be squirted into the holes on either side of the roller so it runs smoothly. Removing the rust will be a huge part of getting it cleaned up. As for more of the clean up, Bob suggested that I go to Hammerpress in the Crossroads district of Kansas City, as that evening was First Fridays and talk with Ben. I followed his advice and ran into more great suggestions from Ben who has restored many presses. The first thing Ben suggested to do is check every tooth on the gears of the roller and the track it rolls on, if there is a crack or a tooth missing that can be a major problem. If everything looks good, the next step would to be to take the press apart as much as I can to remove rust and clean it up. He suggested to have a table at the end of the press so that I can detach the roller and roll it off of the press onto the table where I can clean it. It is important to put marks on the press as well as the roller to help line up where the void should be when putting it back together. For rust, wire brushes, WD40, and naval jelly was suggested. He gave me tips on what type of brayer would be ideal if I have a future in printmaking, explained different types of quoins, making a wooden lock up bar for the press and so on. As a final note, he suggested that I first print with lino just so I can get the feel for how the press should work and then try to master locking in type. After checking out my blog, Ben emailed me explaining that what I called guides "are actually safeties, like a cattle guard on a train, they keep you from getting pinched." Then recommended an orange stripper to get the paint off, as well as introduced me to NA graphics which looks to be a great resource.
After assessing my notes and contemplating what I learned from Bob and Ben, unless a tooth is broken off of a gear or is cracked, I don't necessarily think that the press is broken, rather missing a piece or pieces of equipment used for locking the type in.
We started off by looking over his (rust and blue paint-free) Vandercook No. 2 press that he saved from being used for parts! Through conversation my questions were answered as well as a wealth of more information was presented.

The picture below shows an ink reservoir filled with old ink on Bob's press. My university's does not have one.

This Vandercook press is from the mid 1930's and proves to be a very basic press, without the bells and whistles that modern presses have. First off, this is a cylinder press where the type (letters/numbers) is laid out on the bed of the press and blocked in to prevent any movement. Once the type is set into place, the print maker will lay out ink on the flat surface above the roller, roll the hand brayer in the ink, and then apply it to the type. Next the paper will be positioned directly on top of the type, either held on with grippers (a clip that holds the paper in place) or freely laying on top. Now is where the press comes into place, the printer maker will now use the roller to place pressure on the type so that the ink will transfer onto the paper. That's a pretty basic description as to how this press works. Now for terminology and details that go into the process.
The first step in prepping the press is to cover the roller in multiple pieces of different weighted paper, then cover with tympan paper. Tympan paper usually comes in large rolls which you cut a piece to size and wrap it around one of the dials inside of the rollers void, as you can see in the image below. Next is where you add the 3-4 extra pieces of paper between the roller and tympan paper, once those are in place the tympan paper can be dialed in on the other side. The purpose of adding the paper is to create enough pressure when printing so that the ink will fully transfer, this can be tricky to find the sweet spot as you don't want too little or too much pressure.
.JPG)
The next step after setting up the pressure is to "lock in the type." This consists of getting your type in the order you prefer and then locking it into place on the press with a variety of tools: metal and wooden furniture, leading, quoins and quoin keys, and small bits of paper. Here Bob was giving me a demonstration on how to "lock in type" and below that is what the type looks like when locked in.


The type is blocked into a frame that allows it to be mobile, once set on the press it will be blocked on to the press itself. In the middle of the frame is obviously the type and the bigger rectangle pieces are called either metal or wooden furniture. The little silver bits that fill in the irregular spaces are called leading and come in different sizes. Lastly, the quoins are to the left of the frame, they are used on two perpendicular edges and expand by using the key, to further tighten the frame up. Once everything is tight the printer can pick up the frame and move it onto the press. Below is an image of the frame sitting on the bed of the press and Bob holding what is called a positive lockup bar.These are used on either end of the bed, like the frame it holds everything on the press in place. My guess is this, as well as a frame, is missing from the press I am restoring, which can be easily replaced by a handmade metal or wooden one. The difference will be that the handmade one will stay in place by having dowels stuck into the holes within the press rather than the lockup bar that expands to stay put.

Once the type is blocked onto the press and the typan paper has been set, the printer will hand ink each letter with a brayer and place the paper on top. Finally, the moment of truth, after the roller has passed over the letters, the paper is lifted to see how the transfer turned out. Bob suggested to use Van Son Ink that is specifically for letter press printing rather than the thick ink I have been using for intaglio printing. As for clean up, the water soluble California Wash is doable.
I find it fascinating that printmaking has its own measuring system. The bed of a press is called "point height" which is .918 inches. For a printmaking ruler, each measurement, a "point," is an increment from .918. Any type, across the board is that tall. The saw in the picture below is specifically for cutting furniture to size by using the "point height" dial which is fixed on the saw. Even for cutting the leading, there are slug cutters that are based on that measuring system.

Bob was so kind to teach me practically everything I need to know, he even gave me a tour of his presses and the work he does. I have found that I would love to work with photo-polymer plates in which I could print many of my ink drawings. If you're familiar with solar plates, these have the same concept behind them; water soluble and light sensitive.
As for the actual restoration, I will need to see what equipment I have to work with and what is missing. I will need to purchase heavy weight oil that will be squirted into the holes on either side of the roller so it runs smoothly. Removing the rust will be a huge part of getting it cleaned up. As for more of the clean up, Bob suggested that I go to Hammerpress in the Crossroads district of Kansas City, as that evening was First Fridays and talk with Ben. I followed his advice and ran into more great suggestions from Ben who has restored many presses. The first thing Ben suggested to do is check every tooth on the gears of the roller and the track it rolls on, if there is a crack or a tooth missing that can be a major problem. If everything looks good, the next step would to be to take the press apart as much as I can to remove rust and clean it up. He suggested to have a table at the end of the press so that I can detach the roller and roll it off of the press onto the table where I can clean it. It is important to put marks on the press as well as the roller to help line up where the void should be when putting it back together. For rust, wire brushes, WD40, and naval jelly was suggested. He gave me tips on what type of brayer would be ideal if I have a future in printmaking, explained different types of quoins, making a wooden lock up bar for the press and so on. As a final note, he suggested that I first print with lino just so I can get the feel for how the press should work and then try to master locking in type. After checking out my blog, Ben emailed me explaining that what I called guides "are actually safeties, like a cattle guard on a train, they keep you from getting pinched." Then recommended an orange stripper to get the paint off, as well as introduced me to NA graphics which looks to be a great resource.
After assessing my notes and contemplating what I learned from Bob and Ben, unless a tooth is broken off of a gear or is cracked, I don't necessarily think that the press is broken, rather missing a piece or pieces of equipment used for locking the type in.
Monday, September 2, 2013
Letterpress Restoration: Professional Help
Monday, September 2
Through a few connections, I was able to contact a professional letterpress printer in Kansas City. It turns out that he has an up an running press just like the one I am working on! The plan now is to make a trip to his studio this coming Friday to get a feel for how one should actually run; as well as briefly chat with him about letterpress printing. Wow, such a great opportunity ahead of me, I greatly look forward to my visit later this week. He also suggested that I do some research on these websites before I come: http://www.briarpress.org/ & http://vandercookpress.info/vanderblog/
It will be a perfect weekend to visit his studio as First Friday's at the Crossroads will be taking place. He suggested that I stop in another printing place that will be open for the event, a former employee works there. I look forward to it!
Next stop: looking at the suggested websites to hopefully familiarize myself with letter press printing and answering questions from my last post. Stay tuned!
Letterpress Restoration: Quick Observations
Monday, August 26th
I glanced over the press to make any observations that I could about the current state of the press. This was done in hopes to find a starting point in researching about the press as well as addressing things that might need to be fixed or figured out through the process. Here is my thought process...
1. There is a lot of rust that somehow needs to be cleaned off.
2. The majority of the press is translucently painted a bright blue: removal or leave alone?
3. The handle works, maybe a tad jerky.
4. The large roller (25ish inches in radius minus the gap from the opening) attached to the handle is hollowed with a few removable pieces, maybe for holding paper?
5. One of the, what I am calling, "guides" for the handle and roller, is broken off as shown in the top right image. Doesn't seem to be an issue, maybe will be a problem with balance or something when actually printing?
6. Along with removing rust, I'm sure there will be necessary grease added to run smoothly.
7. The press as a whole has a cabinet and shelves below and a shelf up top, assuming this is storage for ink, letter pieces, and other various printing materials.
8. There is a slab of metal that the roller sits above, there is about an inch gap under the slab and above the base of the press, not sure of the purpose.
9. I'm assuming that the slab is where the letters will rest while printing, if so, how are they positioned to sit still and not move while printing?
10. How do you ink the letters as well as how to apply the paper to press it?
11. Obviously need to learn the parts of a press and how one actually runs.

Friday, August 23, 2013
Introduction to my Letterpress Restoration
As I begin my Junior year of college, I am diving into my printmaking independent studies course. Among paper making, copper etching, and wood block printing on fabric, I also am going to attempt to restore my universities <broken> letter press. The plan is to start researching to get any information on the press to begin my journey in the process of actually fixing it. With great excitement, my goal is to get it cleaned up and running so students in the future can use it. Through the entirety of the restoration, I will be blogging about anything and everything that happens. Enjoy!
Anxious to get started, Tuesday August 20, 2013, I took many pictures of the press and wrote down the information I could find; such as, the date, serial number, model number, company, etc. So I sat down at the computer and started my research... Only to find myself squinting and saying "hmmmm" I realized that this press was not a letter press but a lithography press (which makes sense of the boxes of old lithographs sitting on top). The moment of "oh, no! I don't actually get to work on a letter press" happened and hysterically left when it dawned on me, "ohhhhh, silly me, maybe I should have checked the room for another press." Low and behold, there lies the very letter press that I will be working on in which I have walked by hundreds of times; and so the research finally began.
Thursday, August 22, 2013:
"Vandercook No. 2 Proof Press, Made only by Vandercook & Sons, Chicago U.S.A." This is the information that I could find on the press itself. After a quick google search, I have found that this press is from either 1934 or 1935 and obviously not painted bright blue in its original state. The following information is just the model description found from www.vandercookpress.info/years28-34.html#1934
"From 1934 Vandercook and 1935 ATF catalogs
Bed: 20" × 26" (1934)
Maximum sheet: 20" × 28" (1935)
Maximum form: 20" × 24" (1934), 19" × 24" (1935)
Floor space including handle: 41" × 53" (1934)
Floor space: 2'6" × 4'2" (1935)
Shipping weight: 675 lb
No grippers. Hand inked. Cabinet included. Tindeck blanket. Optional register device."

It looks as though I have a start, onward to learning just how a letter press works, find what is broken and hopefully fix it! I did find a website that sells printing press equipment and parts; we shall see if it's needed. (www.briarpress.org/yellowpages/browse?t=52)
Until next time!
Subscribe to:
Comments (Atom)